

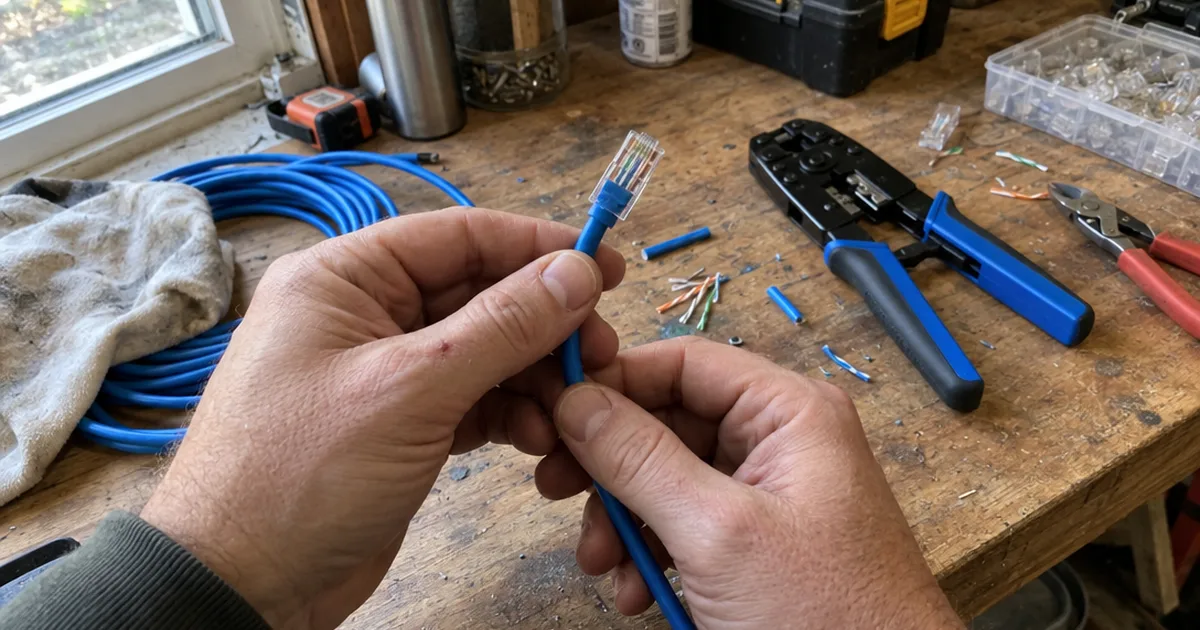
A damaged Ethernet end is an under-5-minute repair.
That’s the claim from PoE Texas, a connector seller, and you don’t have to re-run the whole cable.
So how to terminate Ethernet cable is mostly a question of order: 8 wires, 1 plug and one firm squeeze.
Here are the 8 steps for a plug, in the sequence that keeps you from cutting it off and starting again.
Best for: anyone with a broken cable end, a custom-length patch cable to make or a bare run coming out of a wall. Skip it if a pre-made cable already fits.
Cost: One plug per cable end, plus a crimper, stripper, snips and tester.
Time: Same day.
First step: Look at the cable. A loose cable gets a plug, and a run coming out of a wall gets a jack.
How to Terminate Ethernet Cable Step by Step
To terminate Ethernet cable with an RJ45 connector, cut it square, strip the jacket, line up the 8 wires in T568B order, trim them even, push them into the plug, crimp it and test it.
These steps build a patch cable, the kind with a plug on each end. A bare run coming out of a wall takes a keystone jack instead, and that has its own section further down.
Step 1: Cut the Cable Square and Add the Boot
Unplug the cable at both ends first, then make one clean, straight cut across it. A square cut means all 4 twisted pairs start at the same point.
If you’re using a strain-relief boot, slide it onto the cable now. Forget this and you’ll be holding a finished plug with no way to add the boot.
Step 2: Strip the Outer Jacket
Strip the outer jacket with a cable stripper, using light pressure so you score the jacket and leave the wires under it alone.
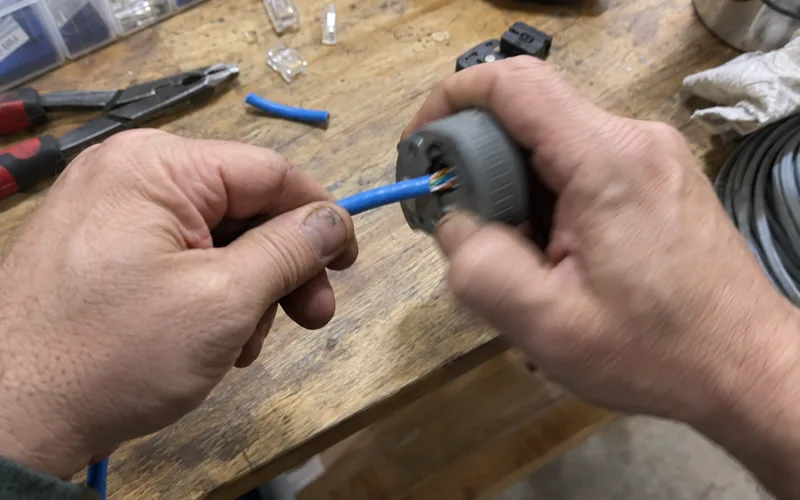
How much should you take off?
PoE Texas instructions say about 1.5 to 2 inches for its pass-through plugs. Other plugs vary, so check the sheet in the bag.
Then check the colored conductors. The same instructions warn that nicked wires can cause speed issues and failure over time, so cut off any nicked section and strip again.
Step 3: Untwist and Straighten the Pairs
Fan out the 4 pairs: orange, green, blue and brown, each a solid wire twisted with a white-striped partner. Cat6 cable usually has a plastic spline down the middle, and PoE Texas says to snip it flush with the jacket.
Untwist each pair only as far as you need to.
Those twists control electromagnetic interference and crosstalk, so keep them running as close to the RJ45 connector as you can. Then smooth each wire straight between your fingers.
Step 4: Put the Wires in T568B Order
Hold the RJ45 connector with the clip facing down and the gold pins facing you, the position PoE Texas uses.
With the cable coming toward you, your wires go left to right: white/orange, orange, white/green, blue, white/blue, green, white/brown, brown.
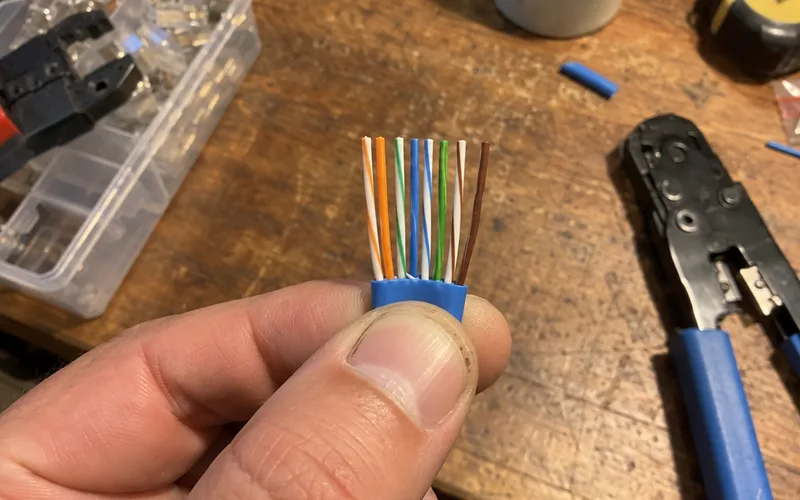
That’s the T568B wire order. Pinch all 8 flat between your thumb and finger so they hold their place while you trim.
Step 5: Trim the Wires Even
Trim straight across with sharp snips, so the tips form one even line. With a standard closed plug, length matters: PoE Texas says wires cut too short don’t reach the contacts, and wires left too long keep the jacket from being secured.
Using a pass-through plug? Skip the exact measuring, because the tips run out the front and the tool cuts them off for you.
Step 6: Push the Wires Into the Plug
Slide the flat row into the RJ45 connector with the clip still facing down, keeping the colors in order. Push until every tip reaches the front and the cable jacket sits under the strain-relief tab.
That tab grips the jacket, so a tug on the cable never pulls on the wires.
Read the colors through the plug once more before you crimp, because a wrong wire is far easier to fix now.
Step 7: Crimp the Connector
Seat the plug in your crimp tool and squeeze the handles all the way until the tool releases. The tool pushes the gold pins down into the conductors to make contact, and on a pass-through plug it trims the extras too.
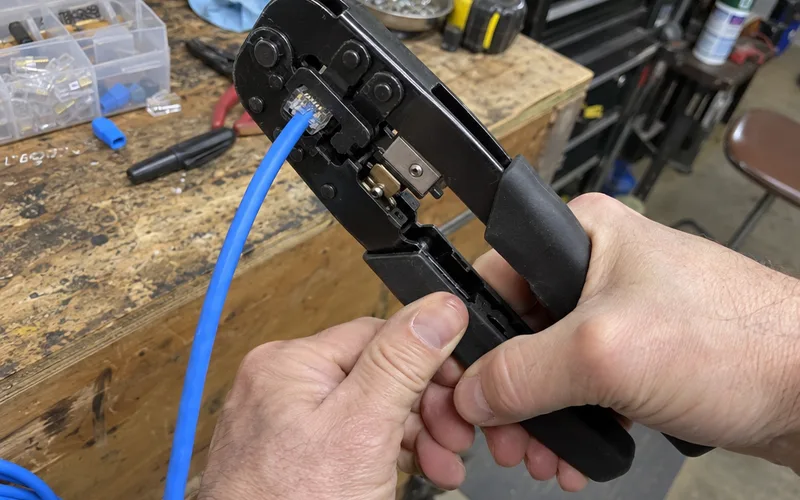
Stopping halfway leaves pins that don’t touch every conductor.
Now repeat Steps 1 to 7 on the other end, in the same order.
Step 8: Test the Cable
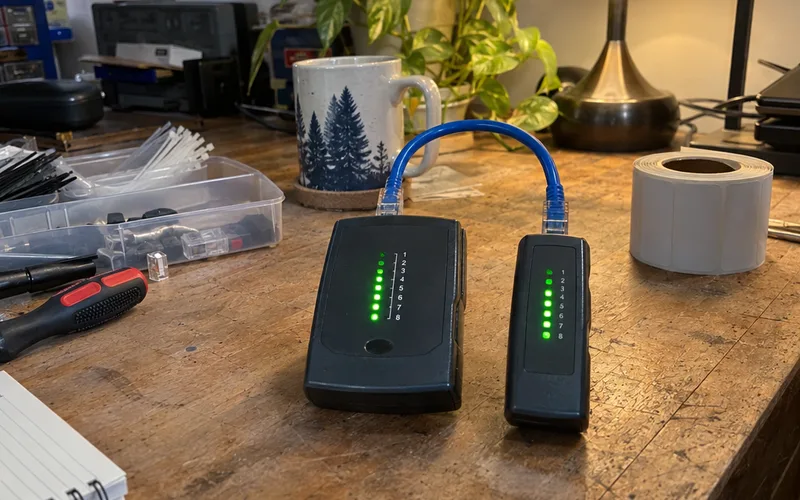
Plug both ends into a cable tester and run it. You want pins 1 through 8 to show in order at both ends.
A missing or out-of-order number means one end needs redoing. Cut that plug off, because a crimped plug is single-use, and start again from Step 2.
What You Need to Terminate Ethernet Cable
To terminate Ethernet cable you need RJ45 plugs rated for your cable, a crimp tool, a cable stripper, flush cutters and a cable tester. A keystone jack or patch panel swaps the crimper for a 110 punch-down tool.
The RJ45 connector has to match the cable twice: by category, and by conductor type.
Solid wire is the stiff kind used for in-wall runs, and stranded wire is the flexible kind used in patch cords. So pick your cable category first, since the plug follows from it.
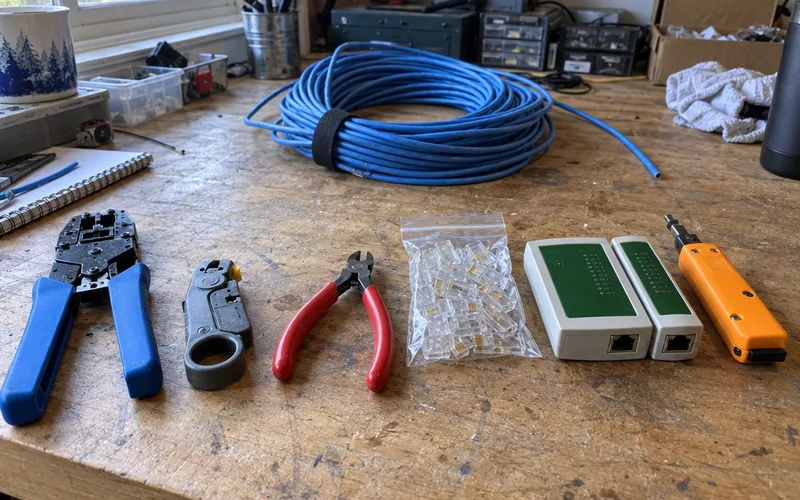
Making your own can also save money. PoE Texas, which sells cable supplies, says bulk cable is much cheaper than pre-made patch cords.
What Does It Mean to Terminate Ethernet Cable?
Terminating Ethernet cable means connecting its 8 wires to a connector, such as a plug, a keystone jack or a patch panel, so the signal can reach your gear.
Why does the workmanship matter so much?
Twisted-pair Ethernet depends on balanced pairs, not 8 separate conductors. Gigabit Ethernet and 10-Gigabit Ethernet both lean on that pairing, so a sloppy end can pass a basic check and still fall short on speed.
Power can run over the same wires too, so see the PoE pinout and the gigabit wiring detail if a camera or access point is on the end.
Should You Use T568A or T568B?
Use T568B on a new home run, unless your existing jacks or panel already use T568A, because PoE Texas calls T-568B the most common wiring standard. The rule that matters is the same order at both ends.
The same instructions say the only difference is that the green and orange pairs swap places. Here’s the full chart, pin by pin:
| Pin | T568B | T568A |
|---|---|---|
| 1 | White/orange | White/green |
| 2 | Orange | Green |
| 3 | White/green | White/orange |
| 4 | Blue | Blue |
| 5 | White/blue | White/blue |
| 6 | Green | Orange |
| 7 | White/brown | White/brown |
| 8 | Brown | Brown |
Neither order is faster, so pick by what’s already in your house. Mixing the two on one cable makes a crossover cable, which isn’t what a normal run needs.
Matching older wiring? Use the full color code, or see how the two compare.
Should In-Wall Ethernet Cable End in a Plug or a Jack?
In-wall Ethernet cable should end in a jack, not a plug: a keystone jack in a wall plate at the room end and a patch panel or second jack at the network end. Short patch cables then connect your gear.
That layout is called structured cabling. Here’s how the 3 ends compare:
| Termination | Where it goes | Tool |
|---|---|---|
| RJ45 plug | Patch cable | Crimp tool |
| Keystone jack | Wall plate | 110 punch-down tool |
| Patch panel | Network closet | 110 punch-down tool |
In-wall cable is usually solid, and solid wire suits the fixed contacts in a jack far better than a plug that gets moved around. The one common exception is a fixed device, such as a ceiling access point or a camera, since that plug rarely gets unplugged.
Still planning the run itself? Start with running cable through a house.
How to Terminate Ethernet Cable Into a Keystone Jack
To terminate Ethernet cable into a keystone jack, strip the jacket, lay each wire across its color-coded slot, seat it with a 110 punch-down tool, then snap the jack into a wall plate. This is also how you finish a cable coming out of a wall with no plug on the end.
Check the run first. A Linus Tech Tips forum member warned in September 2025 that such wires may be phone lines.
So make sure nothing is connected to either end and that each cable is an independent run.
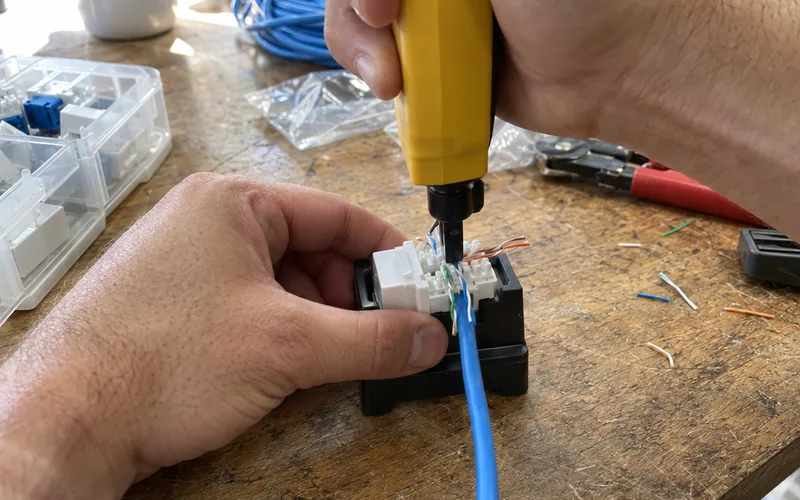
Once the run is clear, the job goes in this order:
- Strip the jacket, following the sheet that came with the jack.
- Pick A or B, using the color labels printed on the jack.
- Lay each wire over its slot, keeping the twists close to the contact.
- Punch each wire down with the blade side facing the outside of the jack.
- Snap the jack into the wall plate and test the run.
Members in that thread explain why you never strip the colored wires here: the metal teeth in the terminals bite through the plastic to reach the copper.
Jacks do vary, with some using screws and others sharp points that need a punch-down tool. So buy for the tool you have, and see wiring a keystone jack for each slot.
How to Terminate Ethernet Cable on a Patch Panel
To terminate Ethernet cable on a patch panel, strip the jacket at the back of the panel and punch each wire into its colored contact with a 110 punch-down tool, following the T568A or T568B labels.
It’s the same work as a keystone jack, repeated per port.
Two habits keep it tidy: support the cables so the panel doesn’t carry their weight, and label each run at both ends.
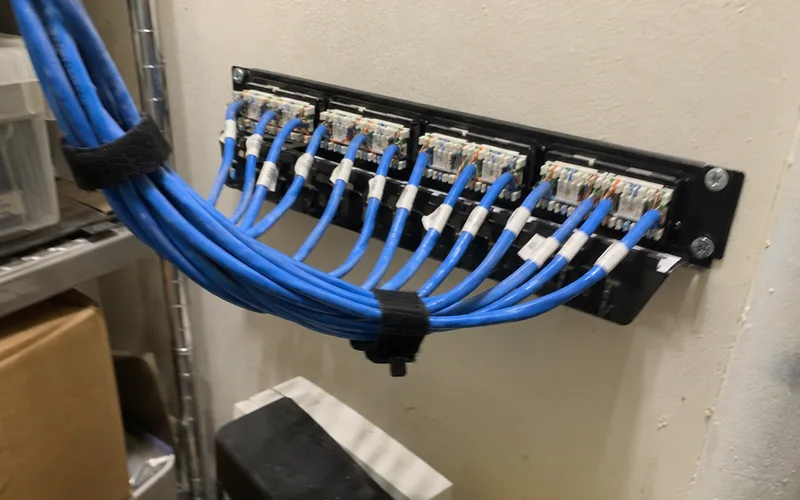
A panel only makes sense once several runs meet in one spot, so check how a patch panel and a switch differ, then follow the patch panel installation steps.
Are Pass-Through RJ45 Connectors Better?
Pass-through RJ45 connectors are easier for beginners, not better in every job, because they let you check the wire order before you crimp. PoE Texas says the plugs are open at the front, so the wires stick out the other side.
You can also push the jacket well into the plug.
The catch?
You need a pass-through crimper, which cuts the extra wire as it crimps. PoE Texas also says these plugs are not recommended for outdoor use, since moisture, sunlight or extreme temperatures can degrade them.
So for a shed or outdoor camera run, pick a different plug and protect the cable with outdoor conduit.
Is Cat6 Terminated Differently From Cat5e?
Category 6 cables use the same T568A or T568B wire order as Cat5e, but they need Cat6-rated plugs or jacks and usually have a plastic spline to trim. The steps stay the same.
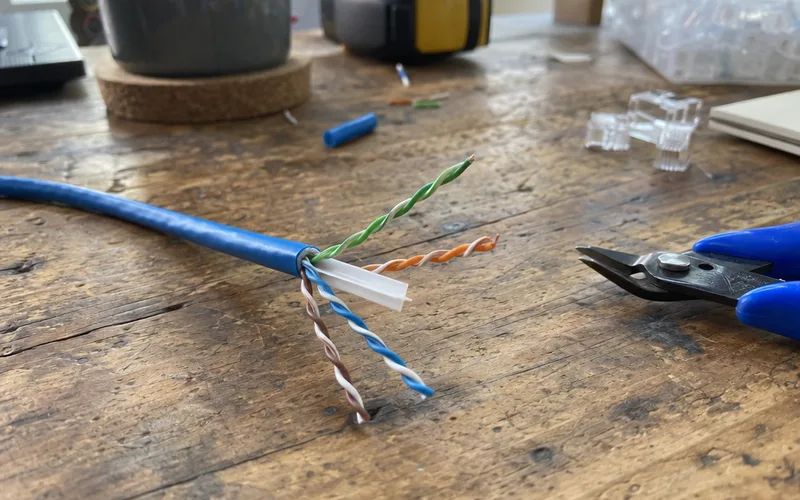
The bigger difference is fit, since Cat6 wires run slightly thicker and its plugs are built for that. Check the Cat5 and Cat6 connector differences and the Cat6 connector types before you order.
Reusing old runs? See what Cat5 cable can carry first.
Shielded cable is the exception, because it needs shielded plugs or jacks and the maker’s own grounding steps.
How to Test a Terminated Ethernet Cable
Test a terminated Ethernet cable with a wiremap tester, which checks that each wire lands on the right pin at both ends. For an in-wall run, test through patch cables at the jack and the panel.
That beats a simple continuity test, which can miss a split pair: all 8 pins connect, but one conductor sits in the wrong twisted pair. The cable looks fine on a basic tester, then signal integrity suffers, most of all on 10-Gigabit Ethernet.
Pro Tip: Test each run before you close up a wall plate.
Why a Terminated Ethernet Cable Doesn’t Work
A terminated Ethernet cable usually fails because of a wrong wire order, a wire that didn’t reach its contact, or a plug that doesn’t match the cable.
Run through these 5 faults before you redo the end:
- Two ends wired to different standards
- Wires untwisted too far from the plug
- A wire stopping short of the front of the plug
- Jacket sitting outside the strain-relief tab
- A stranded plug on solid cable, or the reverse
If the tester passes and the link is still slow, try another port on your network switch, then swap the patch cable.
Frequently Asked Questions
Can you terminate an Ethernet cable yourself?
Yes, you can terminate an Ethernet cable yourself with RJ45 plugs, a crimp tool, a cable stripper, snips and a cable tester. Make a short practice cable first, so you get a feel for how far the wires need to go.
What is the easiest way to terminate an RJ45 cable?
The easiest way to terminate an RJ45 cable is a pass-through plug with a matching crimper, because you can read the wire colors before you crimp. Buy a few spare plugs for your first cable.
What is the correct order for terminating Ethernet cables?
The correct T568B order for terminating Ethernet cables is white/orange, orange, white/green, blue, white/blue, green, white/brown, brown, from pin 1 to pin 8. T568A swaps the orange and green pairs.
How do you terminate Ethernet cable without a crimper?
Terminating Ethernet cable without a crimper takes a punch-down keystone jack or a tool-less jack, not a standard RJ45 plug. Pliers or a screwdriver won’t seat all 8 pins evenly, so buy the right tool if the cable needs a plug.
Can you reuse an RJ45 connector?
No, a standard crimped RJ45 connector can’t be reused, so cut it off and fit a new plug. Keystone jacks are different, and many can be re-terminated if the maker allows it.
Can you cut an Ethernet cable while plugged in?
You shouldn’t cut an Ethernet cable while plugged in, because a cable from a PoE switch can be carrying power. Unplug both ends first.
Final Thoughts
The wire order matters less than keeping it the same at both ends.
This week, make one short practice cable, test it, and fix what the tester shows before you touch a real run.